 Anacortes
 Why Cap Sante Windows Take a Different Kind of Beating
Cap Sante sits close enough to the water that its homes deal with a different set of stresses than houses even a few miles inland. Salt-laden air corrodes hardware and finishes faster than dry inland air does. Wind off Fidalgo Bay drives rain sideways into wall assemblies during winter storms, testing every seam around a window opening. And the long stretch of gray, damp weather that Skagit County gets each year keeps north- and shade-facing walls wet enough, long enough, for moss and algae to take hold on siding, trim, and sills. None of that is exotic information to anyone who has lived here a while — but it matters enormously when you're choosing windows and an installation method, because a window that's fine in a dry inland subdivision can fail early in a marine exposure like this one.
Window installation in this kind of environment isn't just about picking a good product off a shelf. It's about how the unit is flashed, sealed, and integrated with the wall so that wind-driven water has nowhere to go but back outside, and so that the metal components — hinges, locks, cranks, cladding fasteners — hold up against salt exposure instead of chalking, pitting, or seizing within a few years.
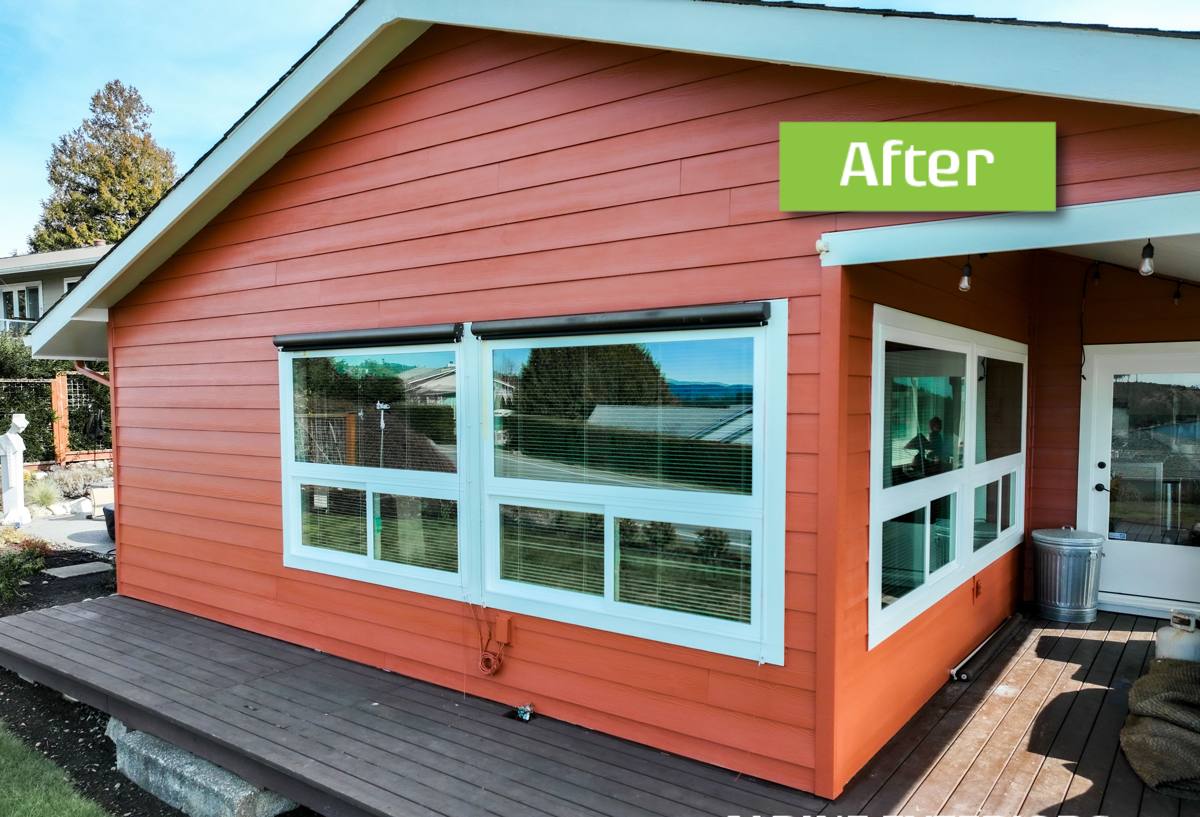
How to Tell a Cap Sante Home's Windows Are Losing the Battle
Most homeowners don't think about their windows until something forces the issue. Here's what that usually looks like locally:
- Condensation or fogging between the glass panes — the seal has failed and the insulating gas or dead-air space is gone.
- Soft or discolored wood at the sill or bottom corners of the frame, often the first sign that wind-driven rain has been getting behind the trim.
- Hardware that's stiff, pitted, or has a chalky white residue — a common effect of salt air on lower-grade metal components.
- Persistent moss or black streaking on the siding directly below a window, which often points to water tracking out of the opening rather than just general dampness.
- Noticeable draft or a cold band of air near the window even when it's fully latched.
Any one of these on its own might just mean a caulking touch-up. Several at once, especially on an older window, usually means the installation or the unit itself has reached the end of its useful life in this climate.
What a Correct Installation Actually Involves
The window itself is only part of the equation. In a wind-driven-rain environment like Cap Sante, the installation details are what determine whether water stays out for the next 20-plus years. A proper job includes:
Sill Pan Flashing
A sloped, sealed pan under the window opening gives any water that does get past the exterior seal a way to drain back out, instead of soaking into the framing. This is one of the most commonly skipped steps in lower-quality installs, and it's one of the most important in a rainy coastal climate.
Integrated Flashing Sequence
Flashing tape and building paper have to be layered in the correct shingle-style order — each layer overlapping the one below it — so water sheds down and out rather than working its way behind the housewrap. Reversing this sequence, even in one spot, can create a hidden leak path that won't show up for years.
Proper Shimming and Fastening
Windows need to be shimmed plumb, level, and square, then fastened without over-tightening — a racked frame won't seal properly against its sash no matter how good the weatherstripping is. This is a big reason cranked-out or hard-to-close windows develop drafts over time.
Insulation Around the Frame
The gap between the window frame and the rough opening needs to be filled with a low-expansion foam or backer rod and sealant — not stuffed with fiberglass, which does little to stop air movement and can hold moisture against the frame.
Exterior Sealant as the Last Line, Not the First
Caulk should be the finishing touch on a system that already sheds water mechanically through flashing — not the only thing standing between the house and the weather. Installations that rely mainly on sealant tend to fail first in exposed, wind-driven locations like Cap Sante.
Frame Material: What Holds Up Near the Water
All the major frame materials can perform well here if they're installed correctly, but they don't behave the same way under salt air and constant damp cycling. Here's how they generally compare for a Cap Sante-type exposure:
| Material | Salt Air / Coastal Behavior | Moisture Sensitivity | Maintenance Needs |
|---|---|---|---|
| Vinyl | Doesn't corrode; hardware quality varies by manufacturer | Low — won't rot or absorb water | Occasional cleaning; check hardware and weep holes |
| Fiberglass | Very stable in coastal exposure, minimal expansion/contraction | Low | Minimal; periodic hardware check |
| Wood (unclad) | Attractive but needs diligent upkeep near salt air and rain | High — prone to swelling, rot at joints and sills if finish fails | Regular repainting/refinishing, especially on exposed elevations |
| Wood-clad (aluminum or vinyl exterior) | Good if cladding and corner seals are intact | Moderate — vulnerable at any point the cladding is breached | Watch for cladding seam failure, especially at corners and sills |
| Aluminum (non-thermally-broken) | Conducts cold and can corrode over time near salt air | Moderate — condensation-prone in our climate | Regular hardware and finish inspection |
Hardware quality matters as much as frame material. Cheaper cranks, hinges, and locks — regardless of what the frame is made from — tend to be the first thing to show salt-air wear on a coastal home. We pay attention to hardware grade on every install, not just the headline frame material.
Our Installation Process
We follow the same sequence on every Cap Sante project, adjusted for the specific wall assembly and window type:
- On-site assessment — we check the existing framing, sill condition, and any signs of past water intrusion before recommending anything.
- Measurement and product selection — exact sizing, plus a frame and glass package suited to the wall's sun and wind exposure.
- Removal of the old unit — done carefully to expose the rough opening and check the condition of the framing underneath.
- Repair of any hidden damage — if there's rot or old water damage in the framing, it gets addressed before the new window goes in, not covered over.
- Sill pan and flashing installation — built in the shingle-lap sequence described above.
- Setting, shimming, and fastening the window — checked for plumb, level, and square before it's permanently fixed.
- Insulating and sealing — low-expansion foam or backer rod at the frame gap, sealant at the exterior joints.
- Interior and exterior trim finish — matched to the home's existing look.
- Final function and weather-seal check — every sash and lock tested before we call the job done.
Timeline and What to Expect
A single-window replacement is usually a one-day job once material is on site. Whole-house or multi-window projects take longer and are best scheduled around drier stretches of weather when possible, since open wall cavities shouldn't sit exposed during a heavy rain system. We plan around the forecast, not just the calendar, especially during Skagit County's wetter months.
Choosing Glass and Performance Options for This Exposure
Glass package matters as much as frame material in a marine climate. A few things worth discussing before you settle on a spec:
- Low-E coatings help with both summer heat gain and winter heat loss — useful given our mild-but-damp temperature swings.
- Argon or krypton gas fill between panes improves insulating performance, though it's only as good as the seal holding it in — which is why installation quality and warranty terms both matter.
- Condensation resistance is a bigger deal here than in drier climates. Interior condensation on cold mornings is common with lower-grade glass packages in humid coastal air; a better-rated unit reduces it noticeably.
- Tempered or laminated glass may be worth it in ground-floor or wind-exposed locations, both for safety code compliance and added durability.
A Practical Checklist Before You Hire Anyone
Whether you go with us or another crew, these are worth confirming before work starts:
- Do they install a sill pan flashing system, or rely mainly on caulk?
- Will they check and repair any rotted framing they find, rather than installing over it?
- What's the manufacturer's warranty, and does it cover the glass seal, the frame, and the hardware separately?
- Is there a separate labor/workmanship warranty from the installer, apart from the manufacturer's product warranty?
- Have they worked on homes in this specific exposure — close to the water, facing prevailing wind and rain?
- Do they explain their flashing sequence in plain terms, or wave off the question?
Why Local Experience in Cap Sante Actually Matters
A window that's correctly installed in a sheltered inland neighborhood can be installed the exact same way in Cap Sante and still fail early, simply because the exposure is different — more wind-driven rain, more salt in the air, more sustained dampness feeding moss growth on north-facing walls. A crew that regularly works this specific area already knows which elevations of a Cap Sante home tend to take the worst weather, which older homes in the neighborhood are more likely to have hidden sill damage from decades of exposure, and which hardware and sealant products actually hold up here rather than just on paper. That local pattern recognition is hard to substitute for, no matter how good a contractor's general reputation is.
Maintenance After Installation
Good installation buys you a long service life, but a little upkeep extends it further in this climate:
- Rinse salt residue off frames and hardware periodically, especially on water-facing elevations.
- Keep weep holes (the small drainage openings at the bottom of the frame) clear of debris and moss buildup.
- Check exterior sealant lines yearly for cracking or separation, particularly after a hard winter.
- Address any moss or algae on nearby siding and trim promptly — moss holds moisture against the wall and can accelerate wear on adjacent window trim.
If your windows in Cap Sante are drafty, fogged, or showing water staining, or you're planning ahead for a remodel, we're glad to take a look and give you a straightforward, no-pressure estimate — no upsell script, just an honest read on what your home needs. The form below is the easiest way to get started.