 Anacortes
 Window Installation Built for Burlington's Weather
Burlington sits inland in the Skagit Valley, but it still gets the full weather pattern that moves through Skagit County off the Salish Sea — long stretches of driving rain, damp air that lingers into a moss season that can run half the year, and wind-carried moisture that finds its way into any gap a window doesn't seal. It's not the direct salt spray you'd get right on the Anacortes waterfront, but the same wet regional climate still works on window frames, sills, and seals year after year. A window that's installed correctly here should shed water, resist rot at the sill, and keep the seals tight through repeated freeze-thaw and soak cycles. A window that's installed carelessly will show it within a few winters, usually as a soft spot, a foggy pane, or a draft that wasn't there before.
This page covers window installation specifically for Burlington homes — what the local climate demands, what correct installation actually involves, and how we approach the job.
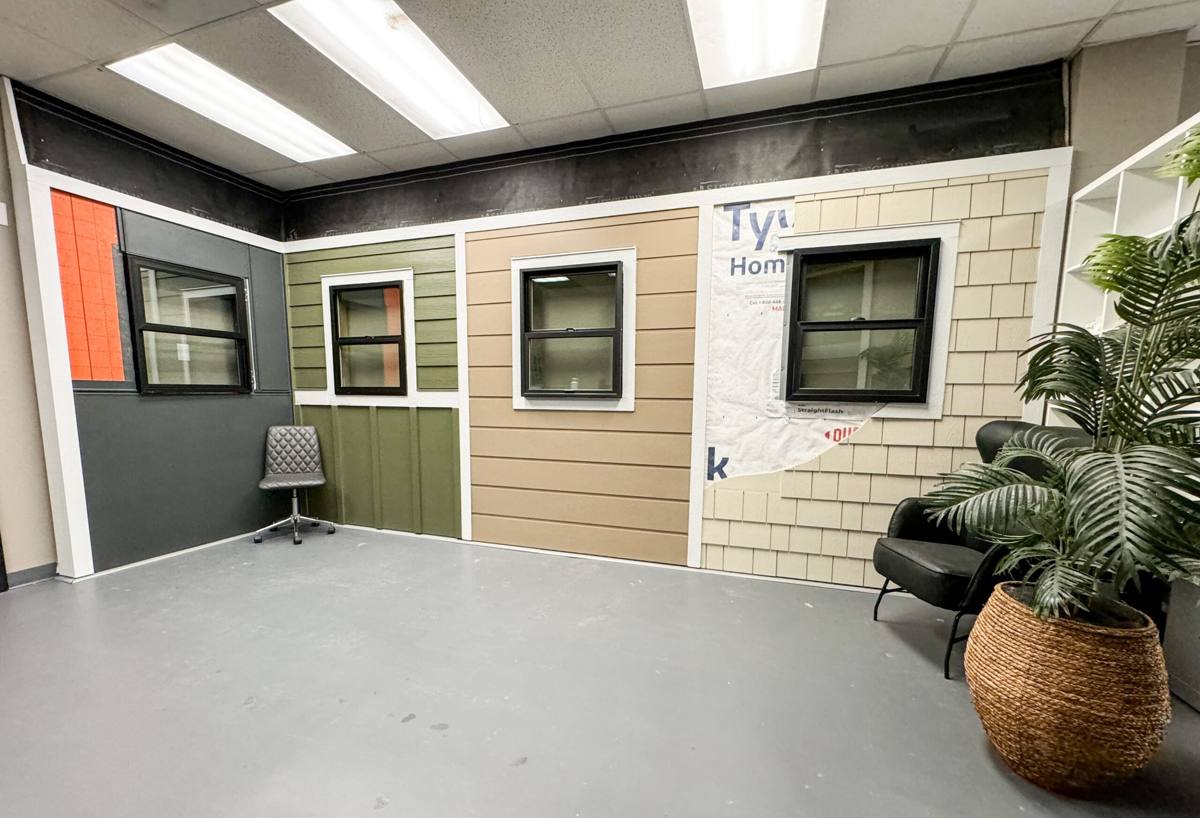
What Skagit Valley Weather Does to Windows Over Time
Windows fail slowly, which is part of why bad installs go unnoticed for years. In this part of Skagit County, the usual culprits are:
- Wind-driven rain that gets pushed sideways into flanges and trim, finding any gap in the flashing or caulk.
- Sustained humidity that keeps wood trim and sills damp longer than in drier climates, which speeds up rot once water gets behind the cladding.
- Moss and organic growth on north-facing walls and shaded trim, which holds moisture against the window frame instead of letting it dry.
- Seasonal temperature swings that stress seals and caulk lines, opening tiny gaps that widen over several winters.
None of this is dramatic on its own. The problem is cumulative — a window with a slightly wrong flashing lap or a skipped bead of sealant might look fine for two or three years before the sheathing behind it starts to soften.
Why This Matters More at Replacement Time Than at New Construction
On a new build, the window opening is framed and sheathed to spec before the window goes in. On a replacement — which is most of the work we do in established Burlington neighborhoods — the installer is working with an existing opening that may have decades of prior weather exposure, old caulk, and sometimes hidden damage behind the trim. Getting the tear-out and prep right matters just as much as the window itself.
Signs Your Burlington Home Needs New Windows
Most homeowners call us for one of these reasons:
- Fogging or a visible haze between panes — the seal has failed and the insulating gas is gone.
- Windows that are hard to open, close, or lock, often from a settled or slightly rotted frame.
- Noticeable drafts near the frame edge, especially during wind-driven rain.
- Soft or discolored trim and sill wood, a sign moisture has been getting behind the window.
- Rising heating bills with no other explanation — old single-pane or failed double-pane glass is a common cause.
- Visible moss or algae buildup on the sill or lower frame that keeps coming back no matter how often it's cleaned.
Any one of these is worth a look. Several together usually means it's time to plan for replacement rather than patch repairs.
What a Correct Window Installation Actually Involves
The window unit itself is only part of the job. In a climate like this one, the install details around the window are what determine whether it holds up.
Tear-Out and Opening Inspection
Every old window comes out carefully so we can actually see the framing, sheathing, and sill underneath before anything new goes in. This is the point where hidden rot or past water intrusion shows up — and it needs to be dealt with before a new window goes into the same opening, not covered over.
Flashing and Water Management
Flashing tape and pan flashing at the sill are what direct any water that does get past the window back out, instead of down into the wall cavity. This is the single most common place we find shortcuts in older or lower-cost installs — skipped sill pans, flashing lapped the wrong direction, or house wrap that wasn't properly integrated with the window flange.
Air and Water Sealing
A correct seal uses the right sealant in the right locations — not just a bead of caulk around the outside trim. Backer rod, low-expansion foam where appropriate, and proper caulk joints all play a role in keeping both air and water out without trapping moisture inside the wall assembly.
Level, Plumb, and Square Setting
A window that's slightly out of square will bind, won't lock properly, and puts uneven stress on the seals — which shortens the life of the unit regardless of how good the window itself is.
Interior and Exterior Trim Finish
The finish work is what protects the install long-term and what you'll actually see every day. Trim gets properly caulked, primed, and finished to match the rest of the home's exterior.
Window Material and Style Comparison
There isn't one "best" window for every Burlington home — it depends on budget, the age of the house, and how much upkeep you want to take on. Here's an honest comparison of the main options we install:
| Type | Moisture Performance | Maintenance | Typical Lifespan | General Cost Range |
|---|---|---|---|---|
| Vinyl | Good — won't rot, handles damp climates well | Low — occasional cleaning | 20–30 years | Lower |
| Fiberglass | Very good — stable in temperature and moisture swings | Low | 30–40+ years | Mid to higher |
| Wood-clad | Good if maintained; exposed wood parts need attention | Higher — periodic finish upkeep | 20–30+ years with care | Higher |
| Aluminum | Weaker — prone to condensation and thermal transfer in this climate | Moderate | Varies widely | Lower to mid |
For most Burlington homes, we steer people toward vinyl or fiberglass because they hold up to sustained damp weather with the least ongoing maintenance. We'll still install wood-clad windows where the look matters and the owner understands the upkeep — that's a legitimate trade-off, not a wrong choice, as long as it's made with eyes open.
Our Window Installation Process
- On-site assessment — we look at your current windows, the openings, and any signs of past water intrusion before quoting anything.
- Honest recommendation — material, style, and glass package based on your home and budget, not a one-size-fits-all pitch.
- Careful tear-out — removing old units without damaging surrounding siding or trim any more than necessary.
- Opening repair if needed — replacing any rotted framing or sheathing found during tear-out, with photos so you know exactly what we found.
- Proper flashing and sealing — following manufacturer installation instructions, which is also what keeps the manufacturer's warranty valid.
- Setting, shimming, and fastening — level, plumb, square, and secured to spec.
- Finish work — interior and exterior trim, caulking, and cleanup.
- Final walkthrough — every window operated and checked with you before we consider the job done.
Cost Factors Worth Understanding
Window installation pricing varies by job, and we won't quote a number without seeing the actual openings. What drives the range:
- Number of windows and whether they're standard sizes or custom.
- Material choice (vinyl versus fiberglass versus wood-clad).
- Glass package — standard double-pane versus upgraded low-E or triple-pane glass.
- Condition of the existing opening — hidden rot or framing repair adds time and material.
- Trim and siding work needed to properly integrate the new window.
- Access — second-story or hard-to-reach windows take more time to install safely.
Be cautious of any quote that skips a site visit or promises a number without seeing your home — that's usually a sign corners will get cut somewhere to hit the price.
Why It Matters to Hire a Crew That Already Works in Burlington
Installation quality is the difference between a window that lasts three decades and one that fails at year five, and that quality comes down to details that don't show up on a spec sheet — flashing sequence, sealant choice, how the opening is prepped. A crew that regularly works Skagit County homes has already seen how the local weather exposes bad shortcuts, and builds the install around avoiding them, rather than learning that lesson on your house. We also carry the trade licensing and insurance a legitimate contractor should have, and we're happy to show that before you hire anyone for work on your home.
Checklist: What to Confirm Before You Hire
- Is the contractor licensed and insured, and will they show proof without being asked twice?
- Do they inspect the actual window openings before quoting, not just count windows from a photo?
- Will they explain the flashing and sealing approach, not just the window brand?
- Is the installation warranty separate from the manufacturer's product warranty, and do you understand both?
- Do they document what they find during tear-out, especially if hidden damage turns up?
- Is the quote itemized enough that you know what you're paying for?
If your Burlington home has windows showing any of the signs above — or you're just ready to stop losing heat and fighting drafts every winter — we're glad to take a look. Estimates are free and there's no pressure to commit; you'll get a straight assessment of what your windows actually need and what it will cost to do the job right. The form below is the easiest way to get started.